When deciding what topic I would craft my first PBL unit around, the post office seemed a clear choice given our current quarantined situation. Now is a perfect time to write letters to friends and family! And why not learn about the post office along the way?
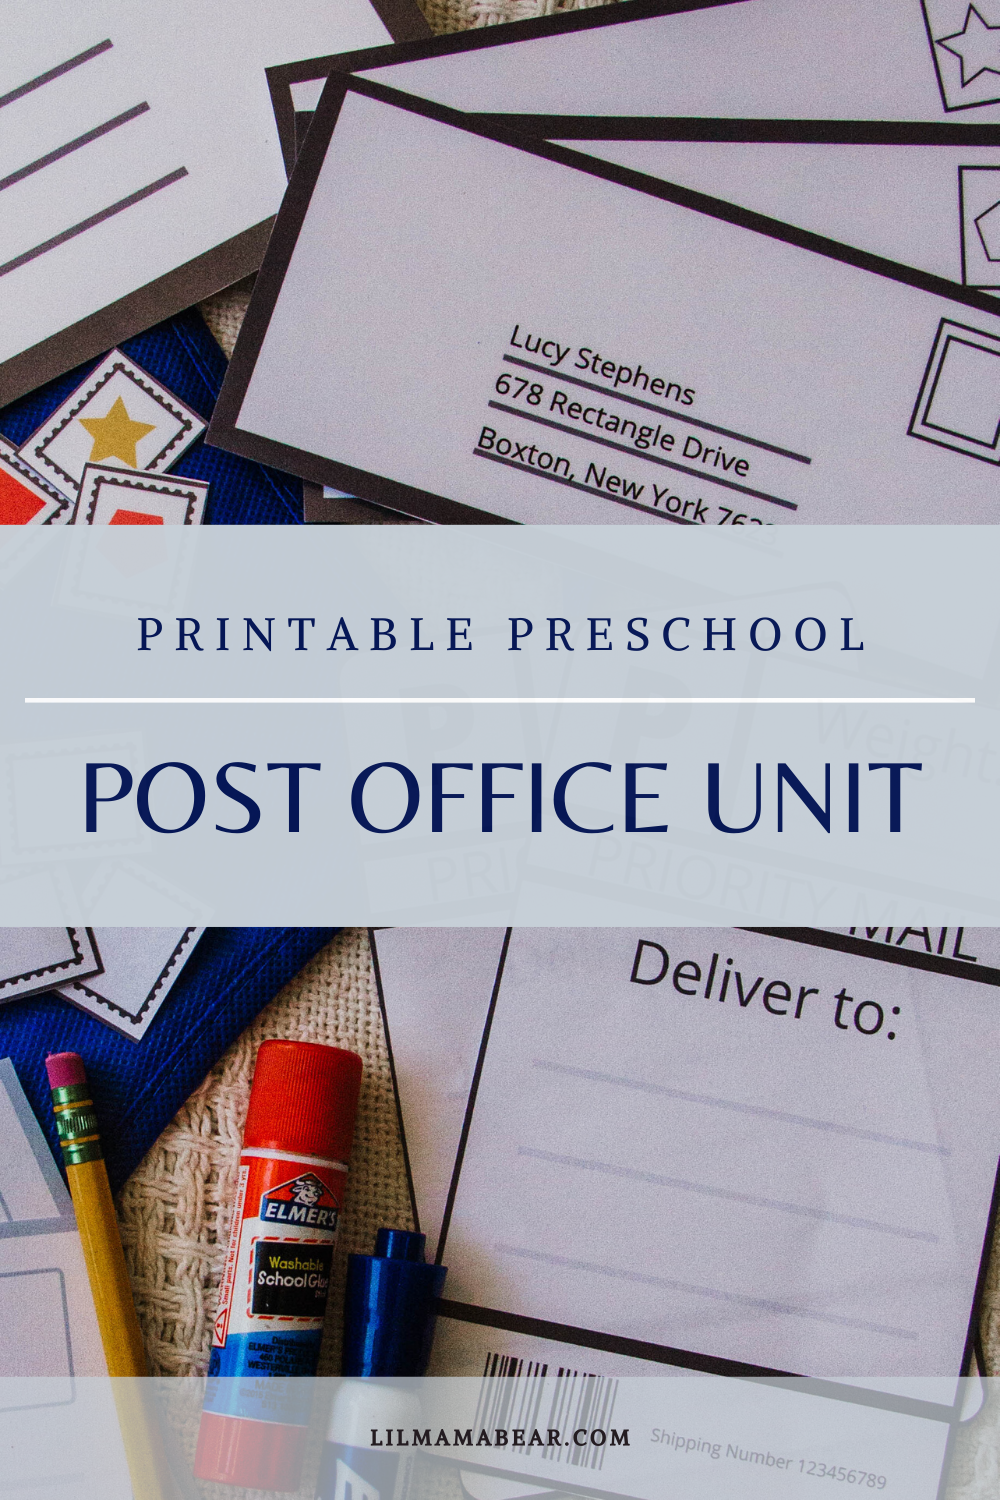
By definition, this is a PBL unit – a project based learning unit (more on that below). Inside this week long unit, you will find games, activities, lesson plans, material lists, read-a-loud links, comprehension questions, and much more! Most importantly, you will find ideas on how to create your own post office at home (or at school)!

What is project based learning?
Simply put, project based learning is a collection of activities, lessons, and assignments that culminate to one finished product. Along the way, many different objectives are reached, and a host of subjects are addressed.
In this PBL unit, the culminating event is building and playing in their very own post office! Along the way, all of the following objectives will be included –
The students will…
- Watch videos on how the post office works, who postal workers (or mail carriers) are, what happens when you mail a letter, and the importance of mail
- Listen to readalouds of books about the post office, mail, etc.
- Build a post office
- Weigh packages
- Record data
- Facilitate dramatic play
- Copy letters of the alphabet, numbers, and words
- Memorize all or a portion of their own address
- Identify the parts of an address
- Design and create postcards
- Compose and dictate, or write, letters to family, friends, and/or toys
- Illustrate attractive advertisements
- Brainstorm describing words
- Match corresponding shapes
- Sort mail based upon street names
- Find and connect the route from the nearest post office to their respective houses or schools
And these are just a few of the potential objectives you can reach with this unit! As I’m typing this, I’m already thinking of additional math and science objectives I could throw in there (such as adaptions mail carriers would have to make in different kinds of weather, serial ordering packages, and more!).
Can you tell I love this stuff?
Can you do PBL’s in school and at home?
Yes to both! If you’re a teacher in a public or private school, there are likely some parameters you must follow when it comes to instruction and lessons, but PBLs are definitely handy tools because they keep students engaged and motivated so long as the “culminating product” is at hand.
Can you teach the same PBL unit to several grade levels at once?
Absolutely. With homeschool, or if you’re forced to quarantine school right now due to COVID-19, this unit can easily be adapted to include more advanced learning objectives as well. You can have students write their own letters, create their own products then advertise by making flyers, create coupons for services… the ideas are endless! If you would like some suggestions on creating more advanced lessons within this PBL, please drop me a message. It’s so much easier to teach one unit to an array of grade levels than to teach several different lessons all day long!
Post Office PBL Unit
I designed this unit to last a week, and we did what we could each day, but these are not hard fast rules. You could do everything in a day or two, you could stretch this out for a couple of weeks if you have additional content to cover. There are no rules! The only thing to remember is to have fun and to go with the flow.
One chief purpose of a PBL unit is to go at each student’s pace and to teach to their interests. That said, it requires a lot of patience, and a lot of letting go. In creating our post office, I had to bite my tongue a couple of times and resist to straighten things that were crooked. I had to remind myself that this was Genny’s creation, and it was most important for her to feel a sense of ownership and accomplishment than it was for it to look “Pinterest perfect”.
What you’ll find:
Inside this packet, you’ll find:
- Printables for dramatic play
- Make Your Own Flyer Template
- Envelope Tens Frame
- Mail Route Game Instructions and Pieces
- Address Mail Sort
- Envelope Printable for Addressing Practice
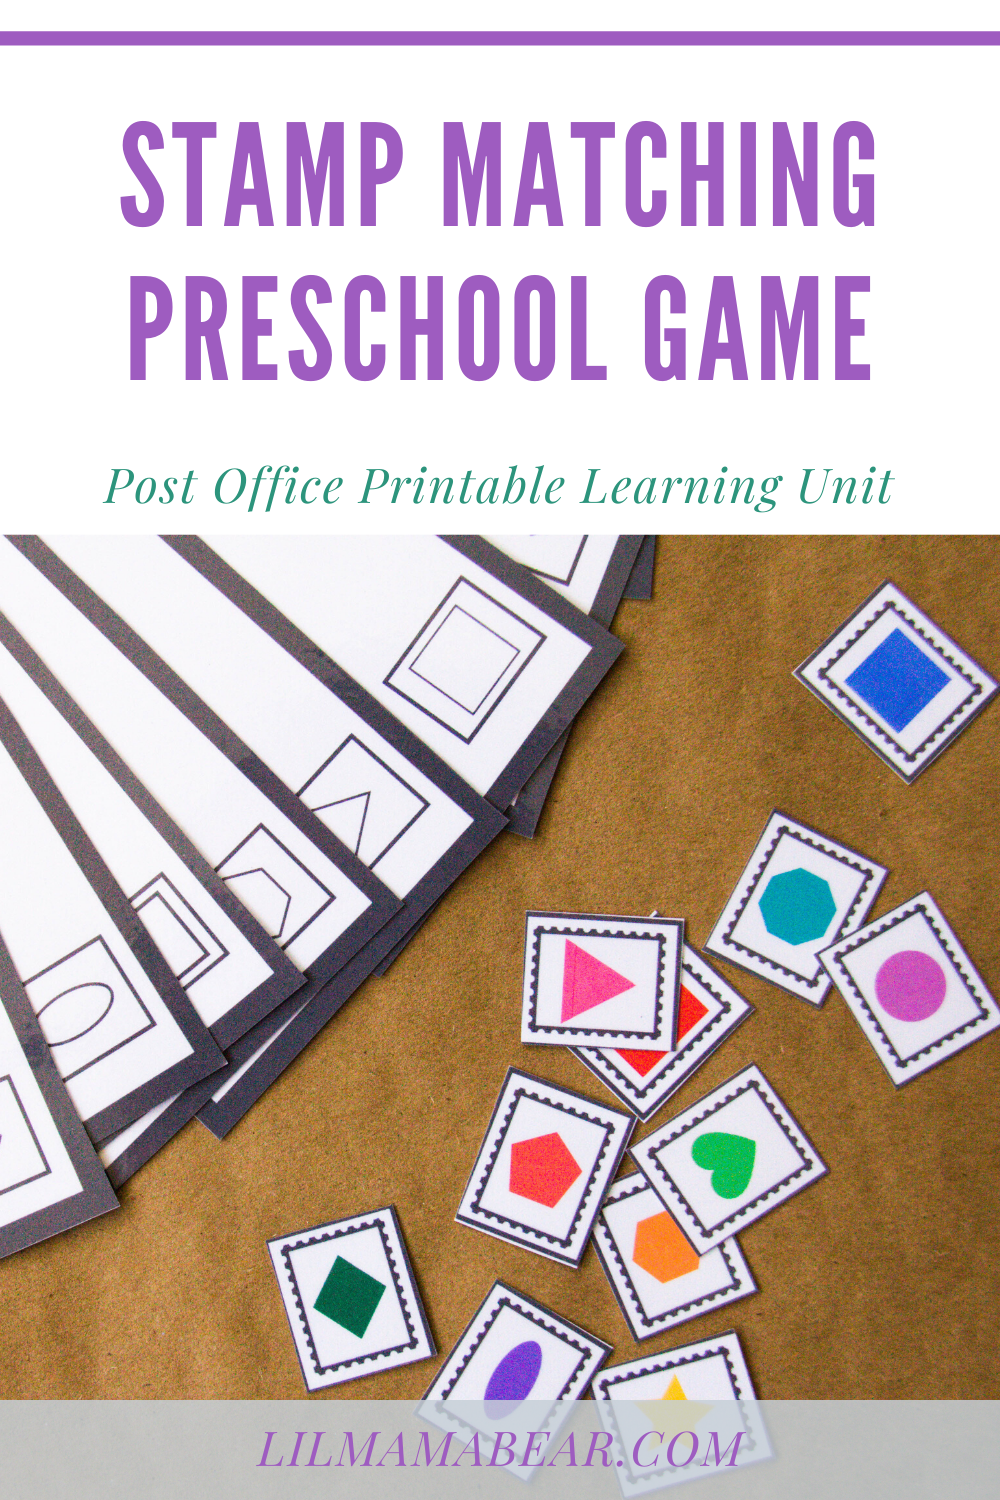
- Stamp Matching Game
- Design Your Own Postcard Template
- Find the Beginning Sound Match
- Printable Vocabulary Words
Plus, you can get a free comprehensive lesson plan for the entire unit right here!
Lesson Plan
The lesson plan has it all – target learning objectives, material lists, YouTube video links, recommended books, corresponding activities and crafts that contribute to the “culminating event” at the end of the unit. The included lesson plans are very broad and are not meant to be followed exactly. Use your instincts, and don’t overdo it! See my post here about schedules and why you shouldn’t be slaves to them unless it’s beneficial to you and your learners.
Additional Resources
Within these lesson plans, I include links to YouTube readalouds and other educational videos. You can find my YouTube playlist with all the videos included in the unit lesson plans here.
There are also some additional activities outlined that I have not included here since they aren’t printables. You can find all the instructions inside the lesson plans, but making the mailbox was a little more involved, so you will find the instructions for that below.
Draw Yourself as a Mail Carrier
I liked starting out with this simple activity because it hooked Genny’s attention and got her thinking about what the topic meant to her. Also, her drawing was absolutely adorable.
After watching the video (linked in the lesson plan and also found here on the YouTube playlist), we talked about what things the mail carrier wore, like a blue uniform, special shoes, hat, etc. Then, she drew herself as a mail carrier with these things still fresh in her mind! You could even go a step further and label the parts of a mail carrier’s uniform.

Have students draw themselves as postal workers!
How to Make a mailbox
This is a super easy project that I let Genny take the reins on!
You just need tape, two pieces of blue construction paper, a piece of red construction paper, and a white piece of cardstock


1. Tape one piece of blue construction paper to the side of the cardstock.

2. Fold over the end of the other side of the piece of blue paper.

3. Lay the blue paper across the cardstock and tape down the folded portion.

4. Fold the second blue paper in half and cut a long dome shape, much like the mouth of a mailbox. I just eyeballed it, but it should be large enough to cover the opening of your mailbox. Cut this in half.

5. Tape one of the dome-shape blue pieces to the bottom of the cardstock so that it can open and close. Tape the second dome-shaped piece to the back of the mailbox so it is closed. 6. For the flag, I drew it on the piece of red paper then had Genny cut it out. Glue to the right side of the mailbox.
Vocabulary Words
If you have a word wall, laminating these vocabulary words and making sure to integrate them into lessons and class discussion throughout the duration of this unit will seal these important new words into your preschoolers’ minds. Even if you don’t have a word wall, they can be great for vocabulary word practice. You can make them memory games, use dry erase to copy or simply trace the letters, or break out some letter magnets and match them up. If you don’t have a dry erase board, then try using a washable marker on the back of a cookie sheet!
Again, so many possibilities!
Culminating Event Tie-in: These can also be used to label things in the post office at the end of the unit.
Make Your Own Flyer
There are many different types of mail. Kids may be familiar with letters. We sorted through some mail that we received, and I pointed out flyers and advertisements and how they are different from letters, bills, and other types of mail that comes in an envelope.
With this activity, I had Genny choose a favorite toy, then we made an advertisement for this toy. Since Genny’s just 3, we haven’t gotten into adjectives, so I briefly touched on describing words. We talked about some different kinds of describing words, then I asked her what she thinks of when she looks at her toy. How does it make you feel? What words do you think of? Then when she needed some additional support, I offered her some suggestions. Pretty, sweet, lovable, fluffy? As she named the ones that fit, I wrote them down. Then she illustrated.
Culminating Event Tie-in: When you’re finished with the flyer(s), put it aside to be used as mail in the post office at the end of the unit.
Tens Frame
By Kindergarten, the concept of the tens frame should already be introduced. The tens frame helps to establish our base ten number system. Using the little envelopes and a dry erase marker, your preschoolers can practice representing numbers 1-10 with the printable tens frame. Tally marks are also included for multiple representation.
Mail Route Game
I love integrating each child’s world with educational content. That’s what gave me the idea for this mail route game! Using Google maps or other such navigational software, plot a course from the nearest post office to the place of learning, whether that be school or home

This is an example I pulled up from a random location
Next, have the student look at the route and then draw it onto a large piece of paper.

Once the route has been drawn, you can add some additional crossroads and alternative routes, so the game is more fun. I had Genny highlight the direct route with a blue highlighter. I’d also suggest putting points at each intersection with a pen or marker to show the “spaces” for the pieces to go between. Here’s what her map looked like.


Voila! We have a game board!
All you do now is print out the pieces, shuffle the cards, and get to playing! First person to make it from the post office to the house wins. Game play is as follows –
Game play:
- Cut out the sun, snow, and water pieces and shuffle into the draw pile. Place the house and the post office pieces where they go on the map. Each player gets an envelope (this represents the mail carrier) and starts on the post office.
- On each person’s turn, he/she draws a card and moves one place. At the end of the turn, the player has the option to place a Snow or Water card on another place. This blocks any player from passing until a sun card is played and both pieces go to the discard pile.
- Play continues until someone reaches the house. (Each time the draw pile empties, the discard pile should be shuffled and turned around into a new draw pile.)
Alternatively, you can simply print out a zoomed in map of the route between your nearest post office and your home or school and use as a playing board.
Culminating Event Tie-in: Use the game board as a route map during play in the Post Office Dramatic Play Center.
Mail Sort
This is a great exercise for learning addresses as well as for sorting, reading, and dramatic play. Simply cut out the envelopes and the “Street Signs”, and get to sorting! With a whole classroom, it would be fun to divide the class up into four “streets” and take turns delivering mail to them all.
For a homeschool classroom, you can simply make four piles for the different streets, or you can make four different mail bags (I cut horizontally cut a brown paper sack and stapled a sentence strip for a strap).

Culminating Event Tie-in: You can use the envelopes during dramatic play in the post office at the end of the unit.
Envelope Practice
We’ve been working on getting Genny to memorize our address. She keeps mispronouncing our street name, but hey, it’s a start. I used the tune to one of The Learning Station songs she likes to get her to remember our zip code. That works so well! In just a few minutes, she was rattling off the five digits.
This activity is mostly for fine motors, practice holding a writing utensil, name-writing practice, identifying the parts of an envelope address (return address, recipient address, where the stamp goes). I showed her where to write her name and where to write the name of the person who will receive the letter.

We were also preparing to address an actual letter she had written, so it was a good transition activity for that.
Culminating Event Tie-in: You can print out multiples of these envelopes and add to the Post Office center, along with some dry erase markers, at the end of the unit if you like.
Stamp Matching Game
This is one of my favorite parts of this unit! Match each shape stamp with the corresponding envelope. Laminate and add velcro or snaps for secure adhesion, or you can just print, cut, and glue for permanent adhesion. I went with the former!


Design Your Own Postcard (and Stamps)
Combining Genny’s love of art with…well anything, gets her very excited. I showed her some examples of postcards, and she decorated them.

Use the printable make-your-own-stamps with this activity
Culminating Event Tie-in: Use this as mail (and stamps!) in the Post Office Play Center at the end of the unit.
“Find the Beginning Sound” Worksheet
This is the only worksheet included in this unit (unless you count the ten frames). I wanted to include something that was more phonics-heavy and low key if everyone needed a calming, straight-forward activity. It includes some of the vocabulary words, so it’s great word work practice coupled with cutting and gluing.
Culminating Activity: Post Office Dramatic Play Center
The best and most exciting goal of the whole unit! You get to build your own Post Office Play Center for dramatic play! We had so much fun with this, so I’m not going to give many parameters. I did make some printable labels, signs, I.D. cards for the kids, shipping labels for packages, stamps, and of course all of the activities leading up to this.


By this point you should have the make-your-own postcards, create-your-own flyers, decorate-your-own stamps, envelopes from the mail sort, envelopes and stamps from the stamp-matching game (if you like), and anything else you have created during your unit week.

This center can now be a regular part of schooling, not just for the week that you do this unit. The most important thing is that you and your students have fun with it! The learning will follow.
Enjoy!
How do you like to teach several subjects at a time? Share with me by commenting below!
Love, Emily XOXO


This looks like so much fun!
Thanks so much! We had a blast doing it!
Thank you so much! This looks like fun!
I hope you enjoy!! 🙂