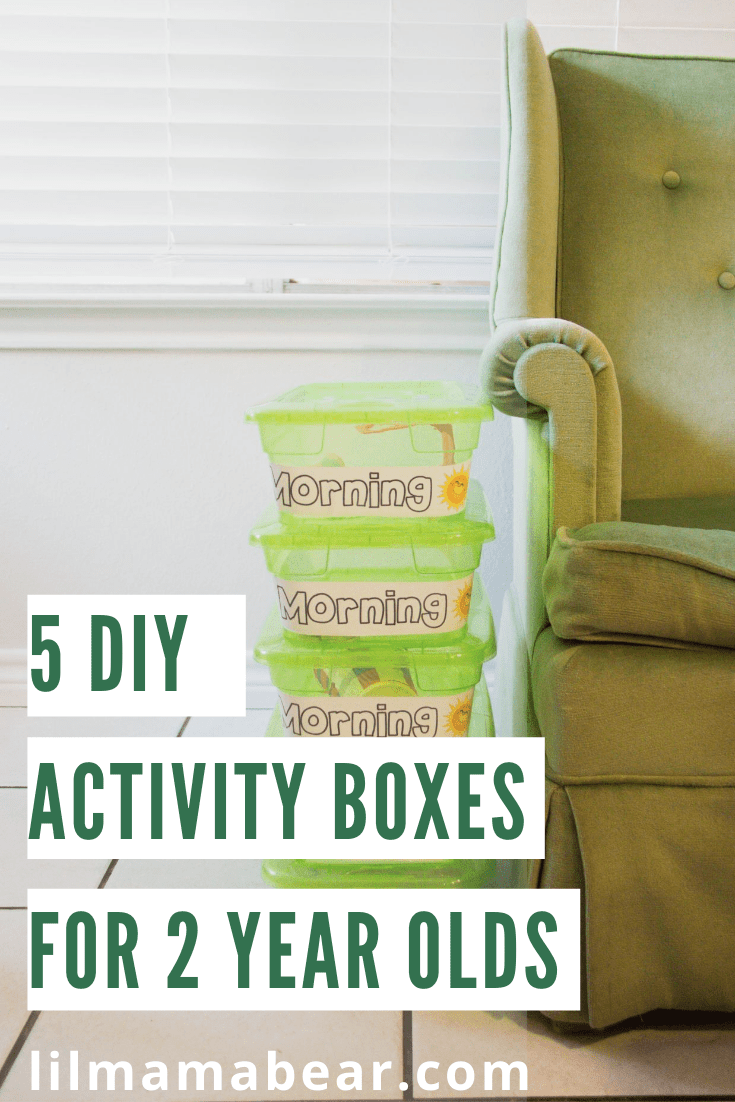
If you’ve ever tried to entertain an energetic 2 year old every day all day, then you know that aint easy! That’s why I decided to just buckle-down and make the activity boxes I have been thinking about making for months. One quick trip to Dollar Tree, and I had everything I needed. Each activity has a particular task for Genny to complete, and I have several back-ups so I can easily switch them out every week. Here is how I made them, how much they cost, and why you need them, too – 5 DIY activity boxes for 2 year olds.
What are activity boxes?
Well let me tell you…actually activity boxes are pretty self-explanatory. Activities. In Boxes. The purpose of them is for Genny to have accessible, educational activities to do every single day that don’t involve a lot of work on my part.
I actually have two categories of activity boxes for Genny right now: “Morning Boxes” and “Blue Boxes”. Morning boxes, as I am describing in this post, are tasks for Genny to complete that will help her to develop a certain skill. (In my post Goals for My 2 Year Old in the New Year, I outline the main skills we are working on this year.) Blue Boxes do not include completing a task but rather more free-form sensory play.
Why do I need activity boxes in my life?
If you want to make your toddler-mom life easier, then you definitely want activity boxes. Fortunately because I have constructed this post for you, it won’t be very much work at all for you to create your own activity boxes.
Every morning, when Genny is dressed and has eaten breakfast, she has 15 minutes with a morning box. This alleviates pressure on me to come up with meaningful activities for her every morning, especially if I’m not feeling good. The temptation to turn on the TV first thing in the morning is real, but Morning Boxes help fight that urge!
How to keep toddlers on track
So we’re talking about activity boxes for two year olds. Being a 2 year old, Genny doesn’t always want to spend 15 whole minutes on one task, but that is just another opportunity for teaching. The boxes have rules, and if she wants to play with them, she must follow the rules.
Genny has become more interested in household roles lately. Every morning, she asks where Ryan is and I tell her he is at work. Whenever I’m working on my blog, photography, or even cleaning the house, I tell her I am doing my work. Naturally, this leads to her wondering what her work is. Morning Boxes and Blue Boxes are Genny’s job. When she begins to lose interest in the boxes before the 15 minutes are up, I remind her that she is doing her work, and that helps her to stay motivated with the tasks.
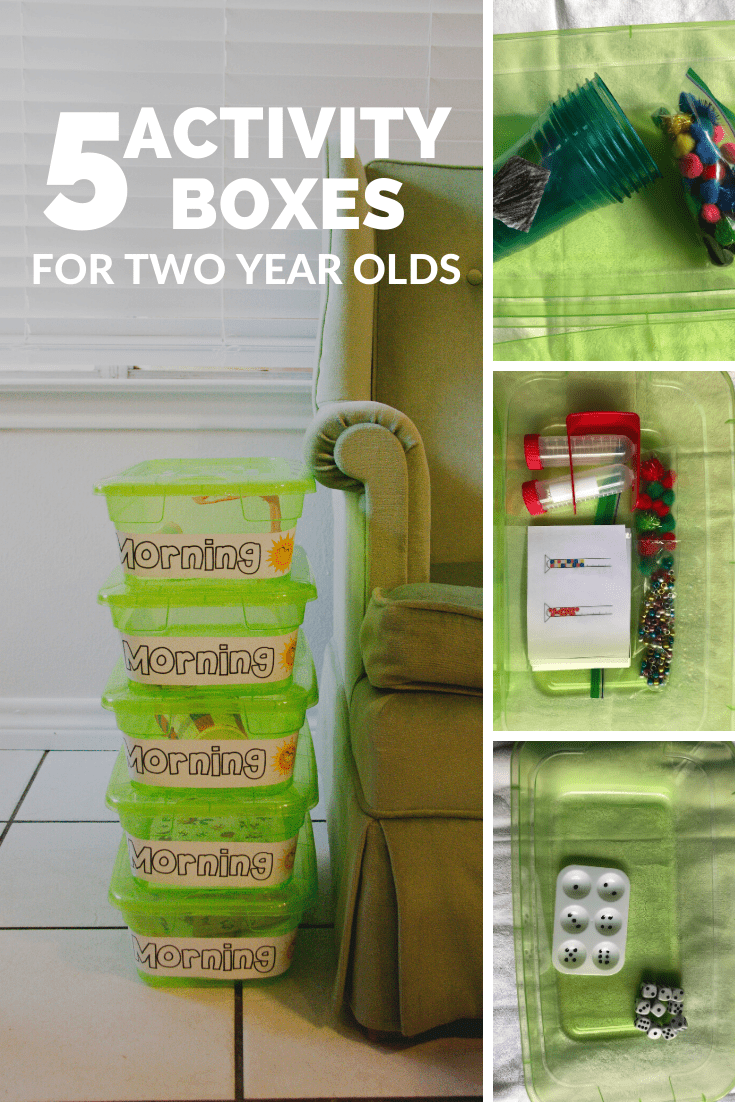
5 DIY Activity Boxes for Two Year Olds
For these boxes, I used things I had around the house plus things I got on a trip to Dollar Tree. With each box description, I provide suggested substitutions to make your activity box assembly as easy-peasy as possible for you. Oh, and inexpensive!
Please note that each of these boxes requires “orientation” for your toddler. Whenever Genny gets a new Morning Box, I go through each step with her to make sure she understands what her task is and how to accomplish it.
1. Sticker Sorting
 Total cost: $2.12
You’ll need:
- Paper
- Pencil and pen
- Ruler (optional)
- Sheet of 60-100 stickers (should be pictures easy for a toddler to sort into 3 categories) – $1
- Shoe-size plastic storage container – $1
- Laminator (optional)
- 1 Laminating sheet (optional) – $0.12 per sheet
How to make: Simply sort your sticker images into 2-3 categories that your 2 year old could easily identify. Ours were foods, things, and animals. We have been talking a lot lately about the differences between things and animals, so this activity was relevant to Genny. I used a ruler to divide the paper into three columns on each side of the paper, then placed an “example” sticker at the top of each column, labeling beneath with either “Foods”, “Animals”, or “Things”. The other side, I didn’t label so she could create her own groups.
Lastly, I laminated the paper to make it more sturdy in the Morning Box.
Adaptions: You can use any type of stickers, but there should only be 1 or 2 different categories. You could do colors, shapes, or three different images. Make your activity relevant to your kiddo!
You don’t need to laminate the sheet, since you will probably only use it once or twice, but I did so it wouldn’t crease in the Morning Box.
Procedure:
- Place each sticker in the column where it belongs. Ask the questions “Is this a food?”, “Is this an animal?”, and “Is this a thing?”.


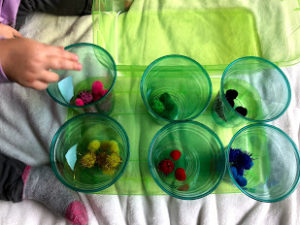
2. Pom Pom Sort
 Total cost: <$2.00
You’ll need:
- Paper and markers (colors to match pom poms)
- Paper and tape
- 4-6 plastic cups (same number of cups as colors of pom poms)
- Shoe-size plastic storage container – $1
- Pom poms (4-6 colors)
How to make: Cut a small square of paper for each cup and scribble a different color on each. Tape each colored square to a different cup.
Adaptions: You can put Scotch tape over the marker in each section to prevent smearing.
Procedure:
- Sort the pom poms by placing them in the cup that has the same color.

3. Dice Matching
 Total cost: $2.16
You’ll need:
- Sharpee
- Shoe-size plastic storage container – $1
- Dice (pack of 6) – $1
- Paint palette tray (6 for $1)
How to make: Using the Sharpee, put 1-6 dots in the sections of the tray, as shown in the photo above. Voila! you are done.
Adaptions: You can put Scotch tape over the Sharpee in each section to prevent smearing.
Procedure:
- Match the number of dots from a die to the section with the same number of dots.


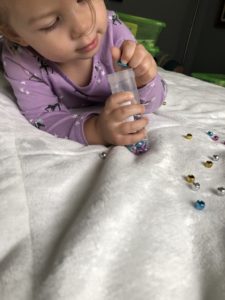
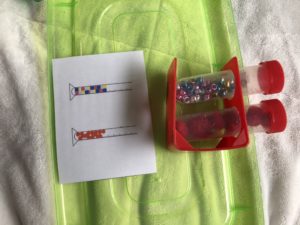
4. Test Tube Sorter
 Total cost: $2.32
You’ll need:
- Play test tube – $1
- Shoe-size plastic storage container – $1
- Pom poms (1-2 colors) – $0.10
- Colored beads (3-4 colors) – $0.10
- Computer or marker(s)
- Paper
- Scissors
- Optional: Laminating sheet – $0.12
- Optional: printer
- Optional: laminator
How to make: You can either use your computer to create the cards or you can just draw a sketch. I laminated them then cut them out. There should be 2-3 cards, each showing a different combination of pom poms in one, beads in the other, both pom poms, both beads, etc. Separate the beads and pom poms into separate baggies.
Adaptions: You can make more or less cards for your little one to use, depending on their ability.
Procedure:
- Remove a card from the box and sort the beads/pom poms into the test tubes to match the card. Repeat with a different card.


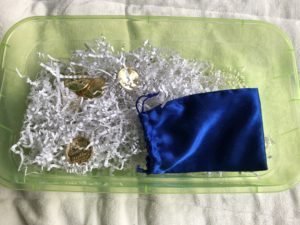
5. Gathering Treasure
 Total cost: $2.00?
You’ll need:
- Gold tokens – $1
- Shoe-size plastic storage container – $1
- Drawstring bag – $?
- Shredded paper
How to make: Toss everything in the box. The end.
Adaptions: If your little one is bored with this and needs to work on more fine motor skills and hand muscle development, throw some big tongs or tweezers in there. You can also use things besides the coins if you want to go for a different theme for the box. You can also switch out what is “hiding” in the box to change it week to week.
Procedure:
- Sort through the paper to find the tokens and put them in the little “coin purse”! (This is a great “St. Patrick’s Day” themed activity)


Hope this post helped you guys out! Let me know what your thoughts are, if you have any suggestions for more activity boxes, if you have any adaptions, or if you want more activity box “recipes”!
What activities do you use to entertain your little one? Share with me by commenting below!
Love, Emily XOXO


What People Are Saying